Here you can learn how to customize Email Templates.
Language
If you notice, you can choose notification language at the top. This will be the language of your notification emails. Right now, the following languages are supported:
Czeck
Danish
Deutsch
English
Español
Eesti
Français, check out the video review
Italiano
Magyar
Nederlands
Norwegian
Polski
Português
Türkçe
Slovak
Svenska
Suomi
Русский
עברית (Hebrew)
日本語 (Japanese)
You can change the email template for each language. For your guest's language of the email will be selected based on the language set in WordPress configuration or the selected language on the page. Emails that are sent to the restaurant will be in the language that is configured on the main settings.

Editing the templates
You just need to select the email template you wish to edit and hit the blue edit button.
Editing the first template
Editing subject and body of E-Mail
You can edit the Subject and body of the email.
The Edit screen
You can fully customize email templates if you have HTML knowledge. Upon clicking the Source button, you can toggle between rich editor and HTML editor:
HTML view mode
If you don’t have enough HTML knowledge, I highly suggest you just use the rich text editor to customize your email template.
If editing failed, and something broke, it makes sense to return to the original settings by clicking on the "Revert default" button.

Another feature that I would like to talk about is “Sync template to all places”. This is useful if you have several restaurants, then one template will be copied to all places.

Adding reservation cancellation to E-Mail
Now let's see, how to add a reservation cancellation to E-Mail.
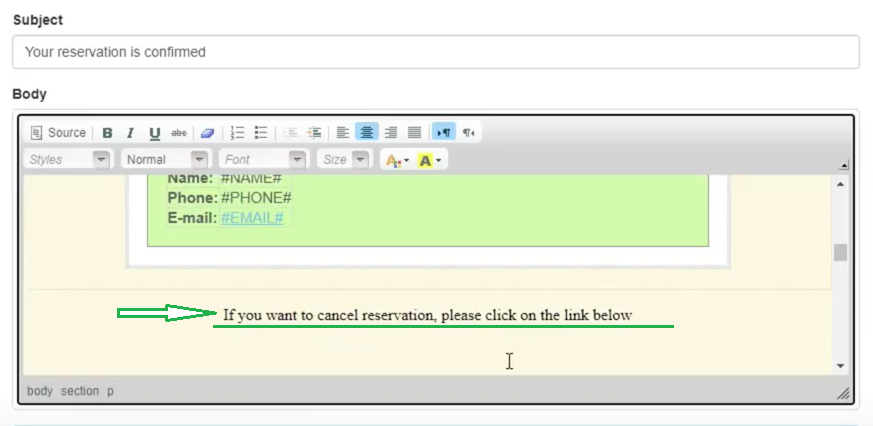
Step 1: Let's start by writing a simple text "if you want to cancel your reservation, please click on the link below".
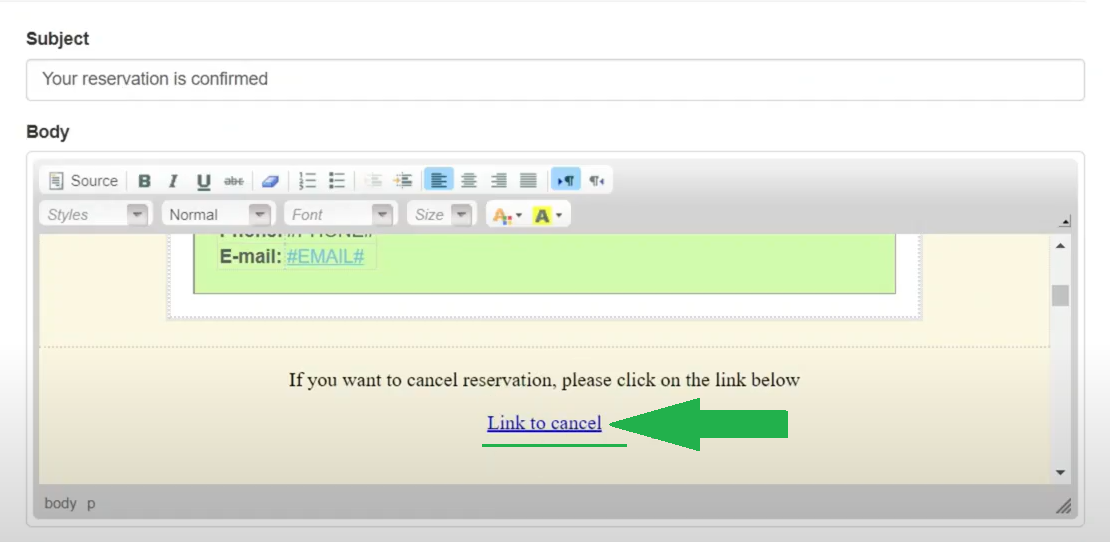
Step 2: Next, you will have to copy this code: <p><a href="https://your_web_stite_url/reservation/#cancel?reservation=#RESERVATION_ID#&personalInformation=#EMAIL#>Link to cancel</a></p>
Step 3: Make sure you replace the “your_web_site_url/reservation” with the URL of your reservation page.
Step 4: Go to the source editor and look for a place where to paste this. You can use the button combination Ctrl+F and search for the text you wrote in the step 1.

Step 5: Paste the copied text and save the changes.

Let’s check how it looks like on the editor.
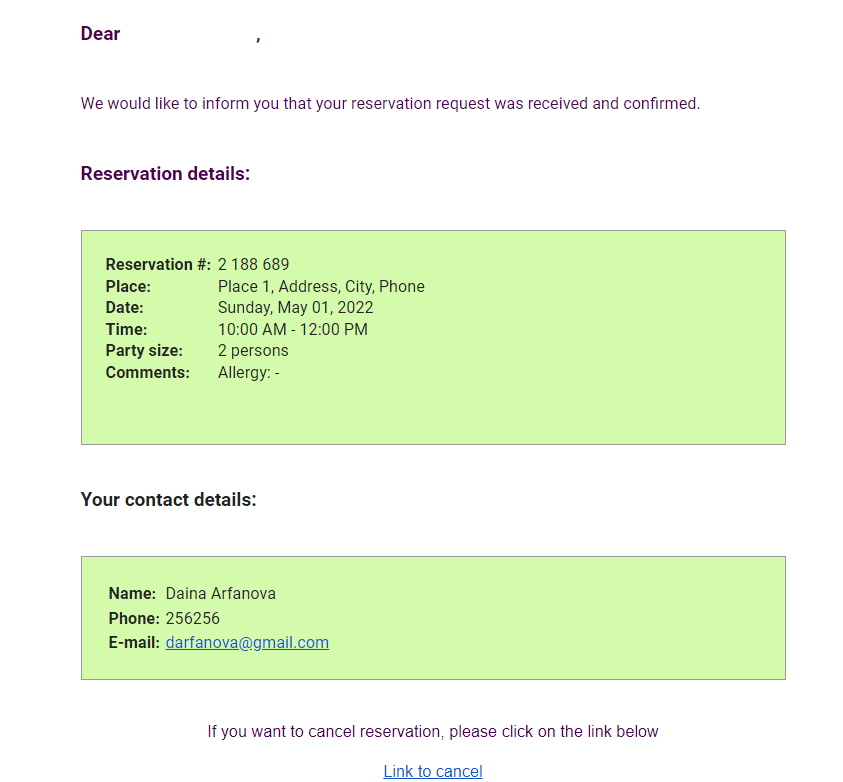
Now let’s create a test reservation. As you can see, we received a confirmation E-Mail with new look, and below is the newly added link to the booking cancellation.
Variables or Tags
The following are the variables or tags.
Variables in the emails
Tags that are enclosed with symbol # will be replaced when the email is created. Feel free to change their positions or completely remove them.
Supported tags:
#ID# - Reservation number
#NAME# - Name of the person that created a reservation
#PHONE# - Person contact phone
#EMAIL# - Person contact email
#START_DATE# - Reservation start date
#START_TIME# - Reservation start time
#END_DATE# - Reservation end date
#END_TIME# - Reservation end time
#COMMENTS# - Comments
#PARTY_SIZE# - Number of guests
#PARTY_SIZE_SHORT# - Number of guests without any text
#PLACE# - Restaurant name with address
Be careful when editing email templates, especially in HTML view. If ever you wanted to revert to default, you can easily do so by clicking the “revert to default” button at the bottom of the editor.